UI quickstart
Create a suite and app in the Studio, add a table and a role, publish a change, and open it as a user in the Runtime.
This walkthrough takes you through building a working Sales CRM app in the Studio and opening it in the Runtime as an invited user.
Open your suite in the Studio
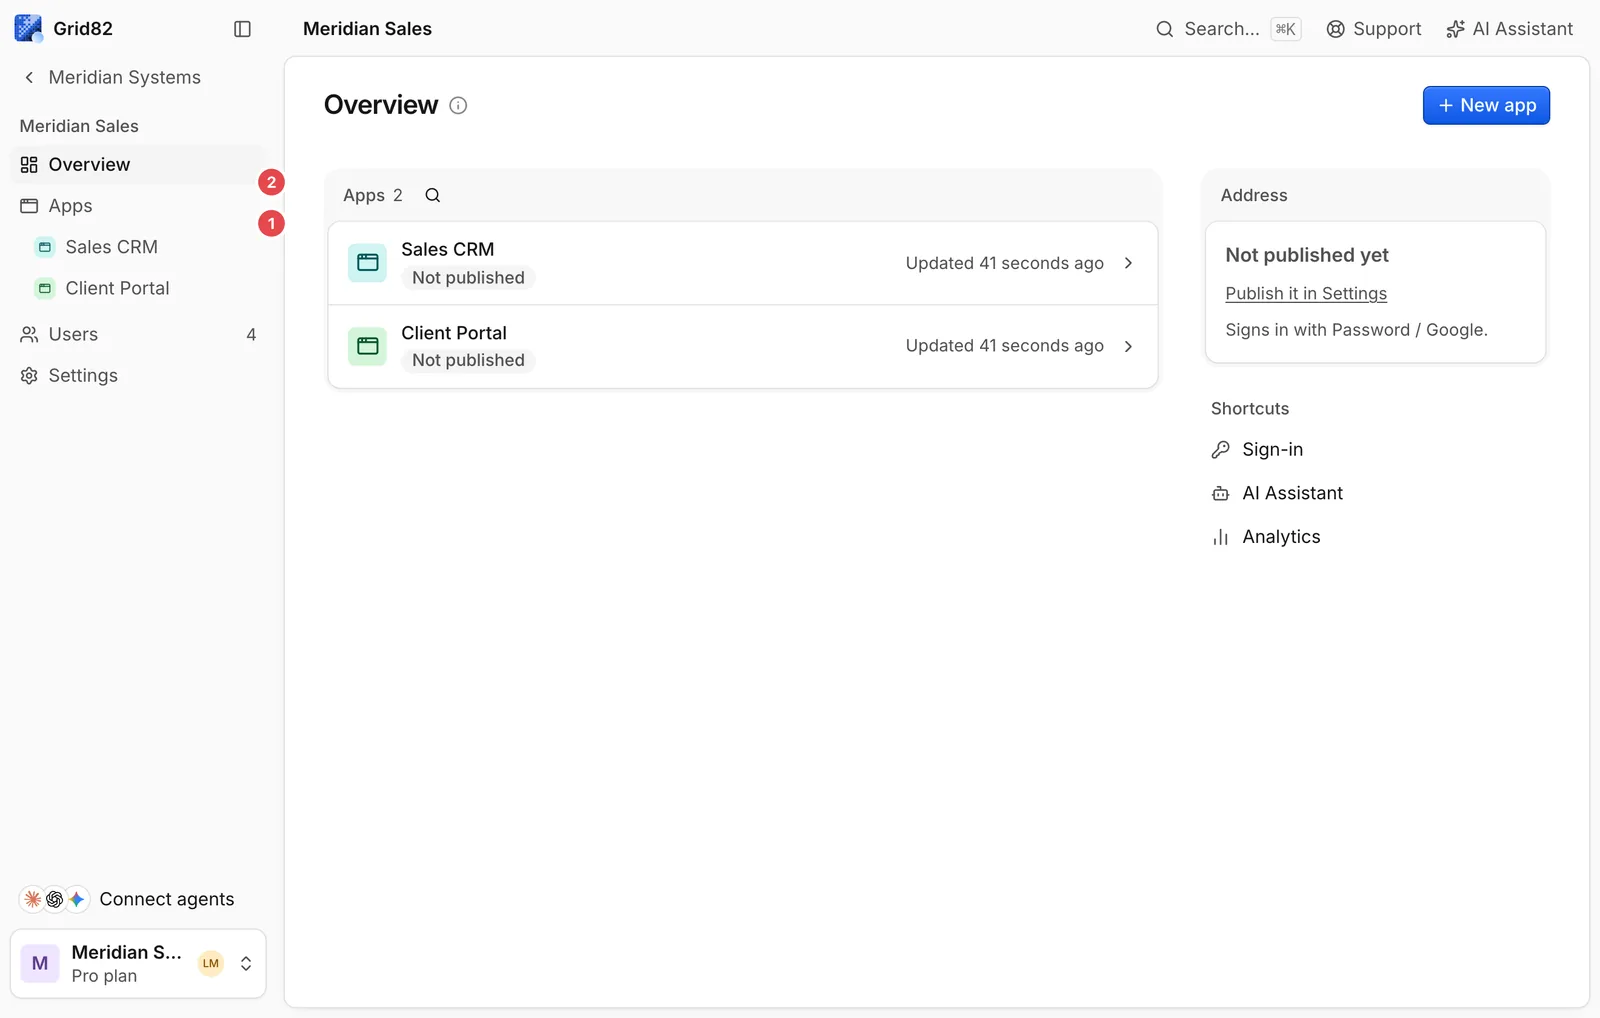
Sign in to https://studio.grid82.app and open your suite. The suite page shows its Apps list (2) along with user directory and custom domain settings. Click an app such as Sales CRM (1) to open its builder workspace.
Define tables and fields
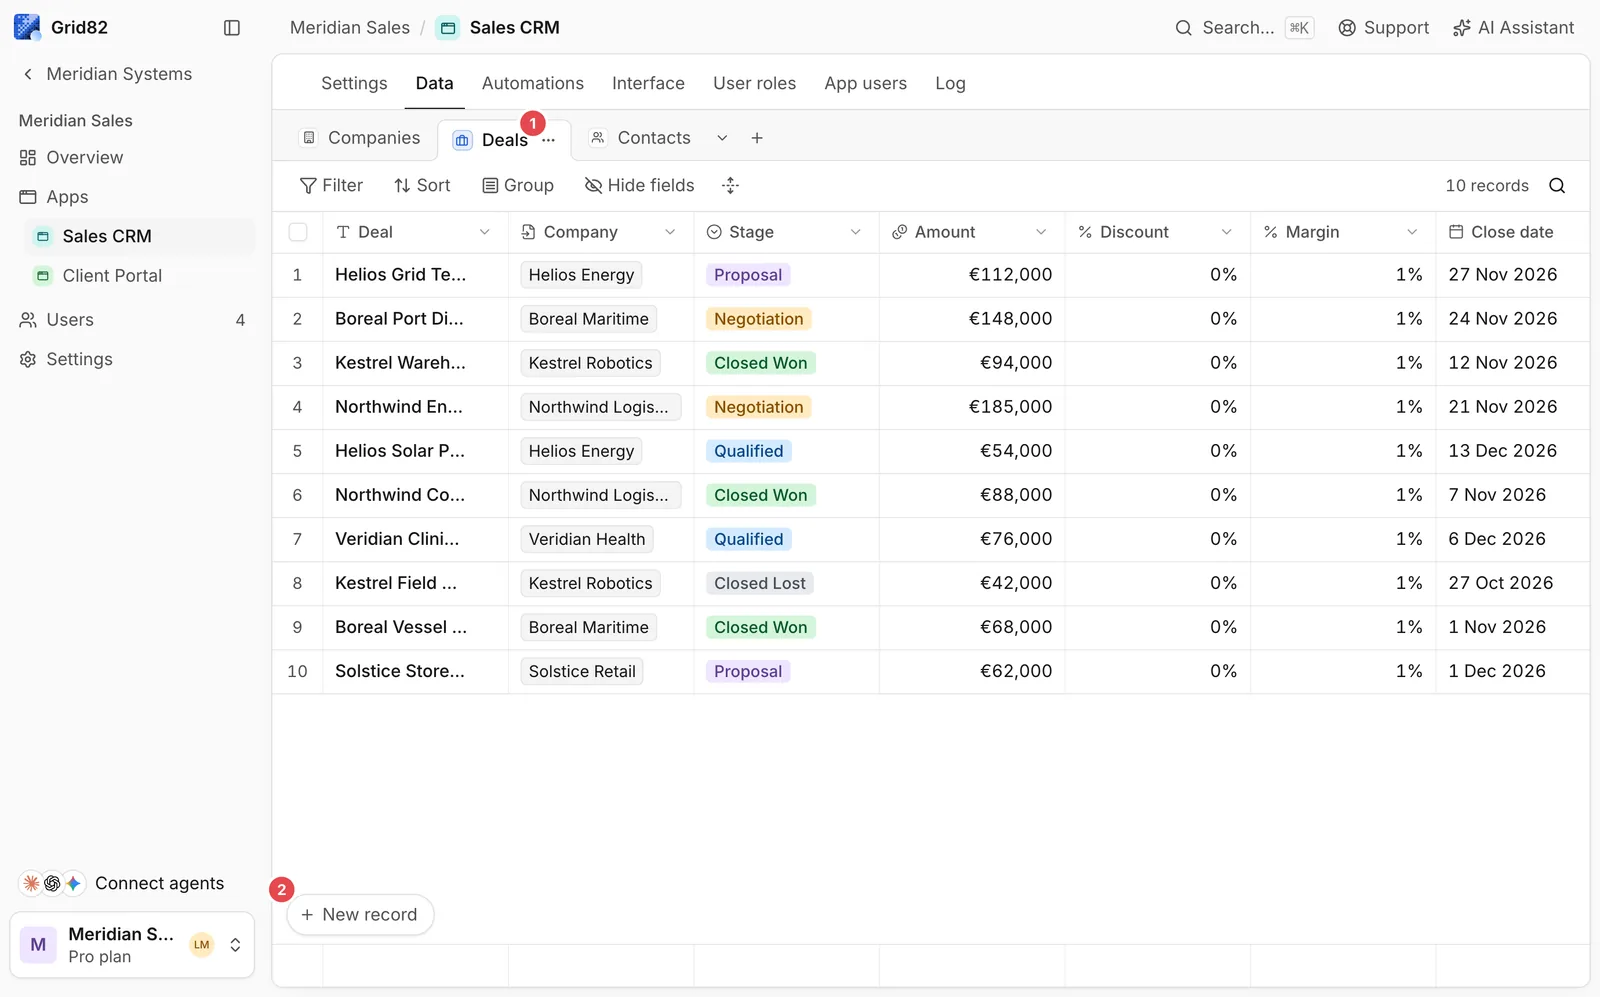
Inside the app’s Data view, use the table tabs (1) to switch between tables such as Deals, Companies, and Contacts. Click + (3) on the right of the header row to add typed fields (currency, select options, links to another table, rollups, or formulas), and click New record (2) to add sample records.
Set user roles and invite members
Open User roles in the app sidebar to define who can see which tables, records, and fields. For example, Sales Manager might see all deals, while Sales Rep sees only deals assigned to them. Then open Users to invite team members to the suite and assign their roles.
Read Roles and permissions for the full rule matrix.
Add an Interface page or an automation (optional)
Open Interface to build custom React pages using Grid82’s SDK and UI blocks, or open Automations to write TypeScript workflows triggered by record changes, schedules, or webhooks. Both work out of the box with the roles you defined.
Open the app in the Runtime
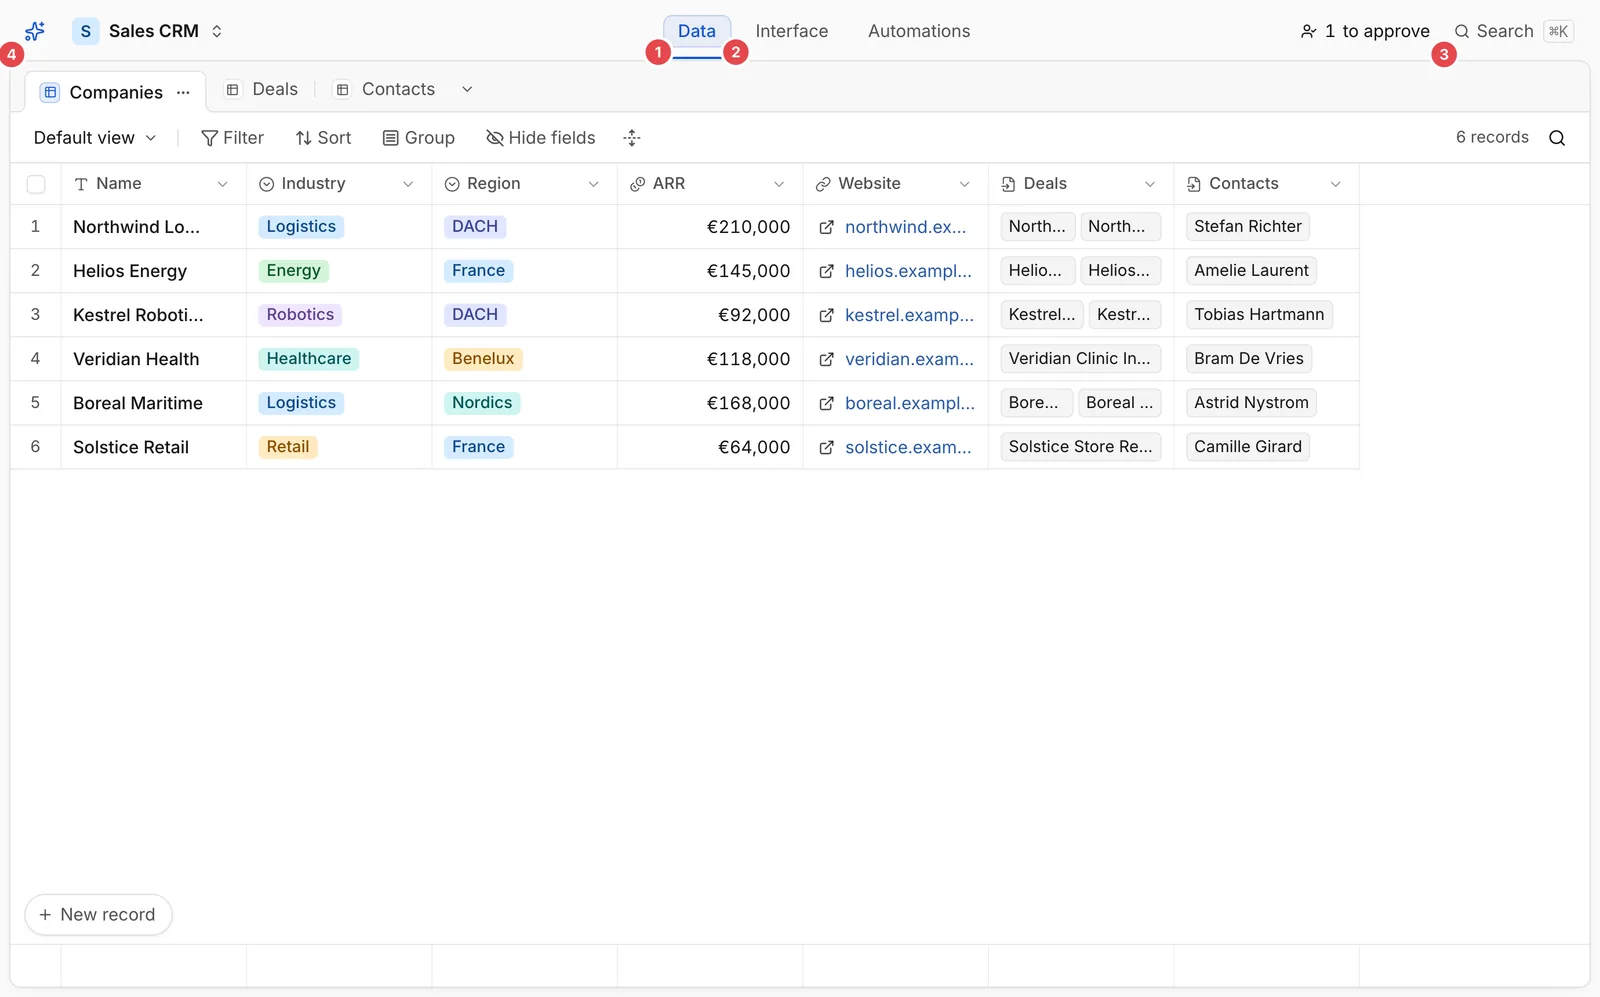
Click Open app in the Studio header (or navigate to https://{suite}.grid82.app/{app}) and sign in as one of your suite users. They land in the live app with the Data grid (1), published Interface views (2), pending approvals (3), and the built-in assistant (4).
Where to go next
- Learn every field type and relation in Field types.
- Build your first custom view in Building pages.
- Connect Claude, Cursor, or ChatGPT to your app in Set up your agent.